
Welcome to XJ900 2007
First problem of the year. Not charging. Not a peep
Recieved on 11th January from Abbey Motorcycles Leicester through Partfinderukltd.com at a total cost of Ł62.00 (Ł56.00 plus postage)Fitting the new Regulator and testing
First the old regulator has to be removed from the bike. This is a case of removing the seat and side panels and then the battery.
|
|
|
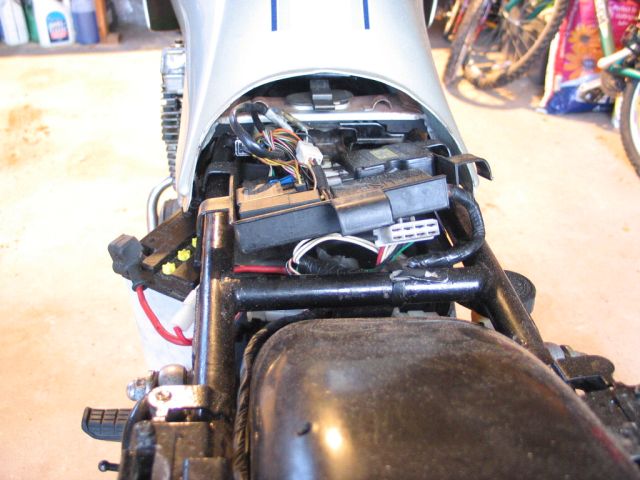
| Remove the battery first. | Trace the wires from the Rectifier back to it's multiblock connector and unplug. (It's under the electrics tray beneath the seat) |
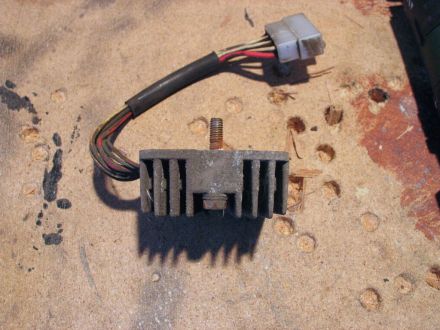
Next I cleaned up the replacement rectifier as it was a bit corroded and also one of the bolts were totally seized in it's hole. Not too much of a problem as it happens.

|
|
| Body of replacement Rectifier needs some cleaning | This bolt is not moving for anyone. Will probably shear off first! |
After cleaning up the body and going to fit the replacement, I realised that there was no need to clean it at all! I had initially thought that the unit would require an earth through it's body but, this cannot be the case as it is mounted on the plastic Battery holder box! I'm no electrician but I do know that Plastic is an insulator. Moving on....
Removing the old rectifier
The rectifier is located beneath the battery box on the left hand side of the machine. Two 10mm bolts hold the thing in place on the (Plastic) box. Undo these bolts using a spanner, or probably two as they are actually nuts and bolts with various washers and will probably turn (if they are not seized!!)

|

|
| Unscrew the rectifier mountings with 10mm spanner/s | Trace wiring block under seat electrical tray and unplug |
 |
| And maneuver the rectifier out the gap between the footrest hanger and rear shock absorber. |
So, I fit the new Rectifier/Regulator and check the battery level before starting.
|

|
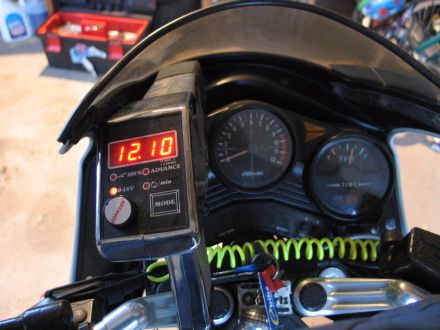
| The battery reads 12 volts at standstill (Not running) | Start up the beastie and the regulator settles at 13.2 volts Yahoo, so it's not the Alternator at all!! great news |
|

|
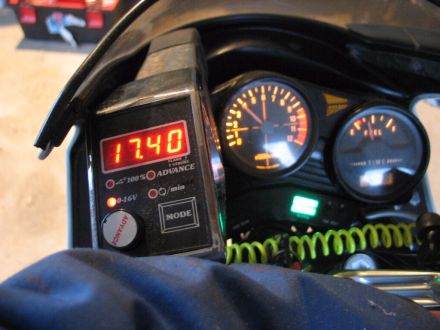
| Booo, Hisss, the regulator is not working well at all. | It goes on getting worse as revs increase. I have seen 19 volts but it's difficult to catch on camera |
SO, I have proved that the Alternator is not faulty but that the original Rectifier/Regulator has indeed died. Sadly the replacement is not too happy either and is overcharging madly but, as luck will have it, Abbey Motorcycles are willing to take it back and send another. I hope that the next one is better. Looks like I will get some riding done next summer after all.
That's all for now.
The new Rectifier
Abbey Motorcycles 01162511919 agreed to send me a Brand New Rectifier Regulator in exchange for the faulty one. I was of course delighted at this news and accepted. They told me that the new one would be about Ł40.00 more than the second hand one but that they were willing to stand that cost as they had sent me a dud replacement.
Yes, I know I should have suspected something was up then as of course there is no such thing as a free lunch. However, a new rectifier turned up several days later:
 |
| Spot the new regulator |
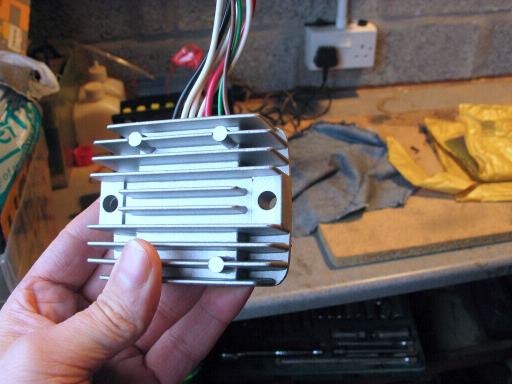 |
| Of course, it's the shiny one!! |
Saturday January 27th
Started bike up and let it run on tickover from 1330 hrs until 1430 hrs today. I was keen to test whether it would charge or not on tickover. Before starting it the battery read 12.10 volts. I started it and it settled to tickover (lights off) at 12.90 volts so, allowing for about 10% error on the meter, about right I suppose. After an hour ticking over the batter was reading a healthy 13.50 volts proving that the system is actually workling. Perhaps the Regulator requires some bedding in period or other that I am unaware of? Anyway, I'm happy with this and we are definately on the road again.
Second problem of the year
The dreaded fork seals
About a week ago now I took the XJ for a quick spin to keep it running and because it was quite a nice day, sunny, breezy and absolutely freezing. NO matter, on with the "Survival Suit" from Hein Gerike which they don't seem to do anymore?? Anyway, this suit is the business for cold climates and is waterproof, windproof and very warm, having foil reflective panels and velour pads all over the place. However, I'm getting sidetracked.
I arrived at the local garage to0 fuel up and check the tyre pressures before my journey. While pumping up the front tyre I steadied myself by gripping the nearside fork leg and....Yuck...covered in oil.
So. it's off home to strip and rebuild. If the fork oil gets on to the brakes then I have further expense and, anyway, the handling will be affected by the lack of damping on one side.
The truth is that, the forks in question were always an unknown quantity since the came from a Scrap yard just before I put the bike off the road for it's 10 year wait. My wife and I have collided with a Sheep and bent the original forks (That was the only damage, apart from the dead sheep!) I had had the fork stanchions straightened and re chromed but, sadly, they still burst the new seals following rebuild. SO, I assumed that the straightening had not gone well and bought second hand forks.
I got over 3,000 mile from these scrap yard bargains so I suppose they did better than expected. The other point is that, the original (now condemned) forks had just had new springs fitted from "Progressive Suspension USA" and it had always been my intention to transfer them to the replacement forks. SO, no time like the present!!
First things first
Order the parts
The first bike shop I called, and I just looked in my local directory and put a pin in the page since there are no nearby dealers (or so I thought) told me that the parts were all available apart from the top bushes which were not sold separately. I argued with this as I had already rebuilt a set of XJ forks but he became quite snotty about it telling me that he was "A qualified and experienced bike mechanic and knew what he was talking about" I withdrew my order and told him I would research this and get back to him.
I called Tom at Spinningdale Motors, which is a tiny Bike/car garage some 55 miles from me in Spinningdale, just south of Bonar Bridge in Sutherland. There was no fuss and the parts were ordered and available at the shop in just two days. The difference is that Tom IS an experienced motorcycle mechanic and DOES know what he is talking about so, if you are in the area, give him a call.
So, the parts were purchased, top bushes, fork seals, snap rings and dust seals for both forks which came to Ł49.00 including postage. I had originally wanted bottom bushes as well but was talked out of it by Tom who also said I was wasting my money putting top bushes in at this stage. I explained that the forks were an unknown quantity and he understood a bit better.
Doing the job
March 5th 2007
The day dawned bright and very windy, a perfect day for not being outside! The bike sat sadly in it's corner already supported on the log that it had spent the previous ten years on...it was looking very worried!!
 |
| Poor XJ, looks worried don't you think? |
 |
| The wheel is gone again |

|

|
| Remove the Mudguard first | And then the fork brace comes off |

|

|
| Remove the Top Pinchbolts | And both Bottom ones |
And, ladies and gentlemen, the fork legs slide out in your hands!!
 |
| And, to coin a phrase...ForkOff |
First part of stripping the forks is to remove as much of the oil as possible. This is achieved by removing the drain screw at the bottom of each leg and, while the leg is placed in a receiving canister of some description, pumping the fork gently to expel the oil. There will always be enough oil left to make an incredible mess everywhere during this job however, the above procedure should limit this to a great degree.
Next see if, while the pressure of the spring is still on, you can loosen the bottom damper bolt. Usually you can't and the entire inner assembly will turn with the bottom bolt.
Also, it's a fairly large Allen bolt and, certainly in my case, the socket type Allen keys will not pass through the hole in the bottom of the fork leg so.....
We have two problems straight away
How to actually drive the Allen bolt in question
How to prevent the inner damping mechanism from turning while carrying out point 1
Now, luckily for you dear reader, I have met these problems before and, I've solved them...well, I don't suppose I actually solved them but, I found out how to get around them without resorting to Yamaha special tool number 000256487 costing many hundreds of your currency.
point 1
Use an ordinary Allen key which fits up into the recess. This however is not a very efficient tool for applying the sort of force required to loosen this bolt so. Apply the ring spanner extension trick..or, even better, a length of suitable tubing to the end of the Allen key. The ring spanner extension trick I hear you say?
 |
 |
| As can be seen in these examples, the Allen blt can be operated with a ring spanner Allowing more leverage. You can also see a large screwdriver shaft being used in the Caliper mount holes to steady the Fork leg. |
 |
| This is just an example of the Assembly you are trying to remove. Or, one I did earlier!! |
If this still does not work then we have to move to plan B. Plan B also address's point 2 above, how to stop the Damper mechanism from turning.
Now carefully remove the top cap from the fork leg. This is a 17mm Allen key and is a very unusual size to require. I can't find a bolt on the bike to help with this one but I'm almost sure there is one and that it could be the rear axle but I can't remember and, since I didn't need it I didn't try.
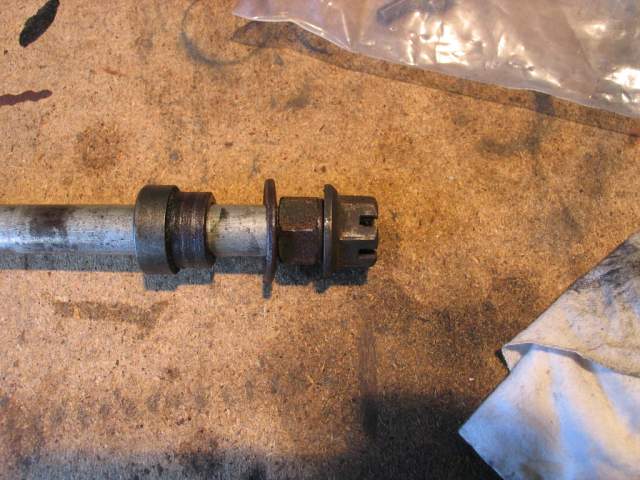
You will need loads of rags now as there will be still plenty oil about. Once the spring has popped out and frightened the life out of you you can withdraw it, with a rag at the ready to catch the oil caught in it's coils. Now comes the clever part. Using the front wheel axle bolt which you have in front of you in a clean container (Don't you?) you make a holding tool for the inner damping mechanism. This is achieved by locking two nuts on the end of the axle by counter rotating them toward each other like this: (The second nut can be found on the rear wheel axle in case you don't have one!)

|
|
 |
| Here you can see what is happeing inside the leg with your new special tool! |
Incidentally, the spacer and washer from the original axle assemble need to be removed. I worked this out eventually as the washer is too big to pass into the fork tube!!.
You then drop this tool into the fork leg and, with a 17mm socket and two extensions, you can turn the damper with a ratchet while holding the bolt at the bottom with technique one.
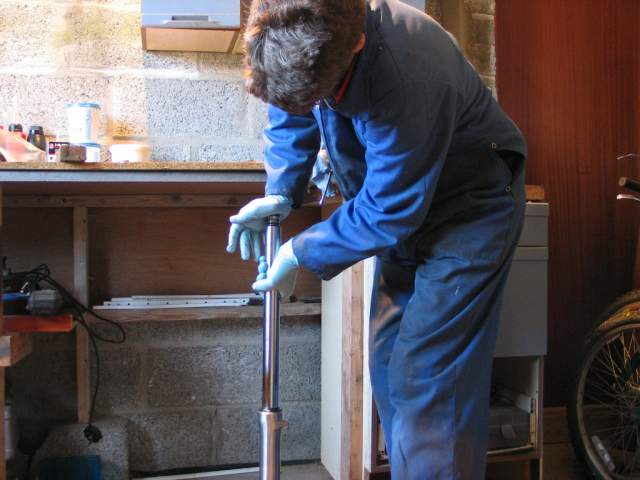
It should be noted at this point that all of this would be much easier with an assistant but, in the absence of one, a small vice to hold the tube (soft jaws or plenty rags) and rotate the assembly until the bottom bolt Allen key comes into contact with the bench top and then hold the fork leg with the long screwdriver in the Caliper mount holes while turning the Ratchet (and juggling some plates on your head too!!) can work...and did for me but I pulled muscles in places where I didn't know they existed!
Once you have the bolt slackened it can be removed from the bottom of the fork. Watch out for the little Copper washer which, should be replaced in ideal circumstances but...I've never done this and simply give the old one a little rub with fine emery paper and reuse it. You choose.
The damper assembly can now be removed from the tube or, for now, it can remain in place. I removed it and this is done by just tipping it out.
Removing the old seals and bushes, or, stripping the forks...PtII
|

|
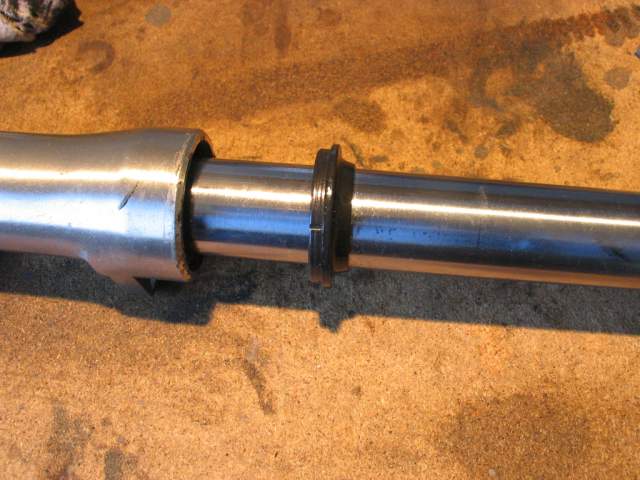
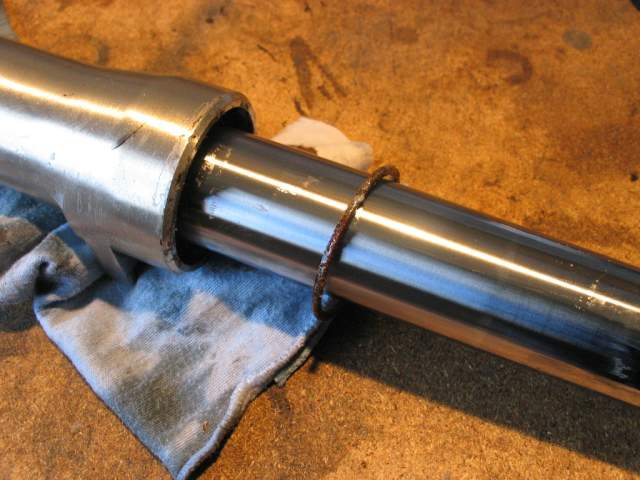
| First remove the Dust Seal | Then remove the retaining snapring |
Finally the smaller top washer which protects the seal can be removed and, when that is done grasp the top and bottom halves of the fork one in each hand and operate the fork from about half way open to full extension sharply a few times to dislodge the remaining components. It's like using the fork as a slide hammer! To get the following result:
|
|
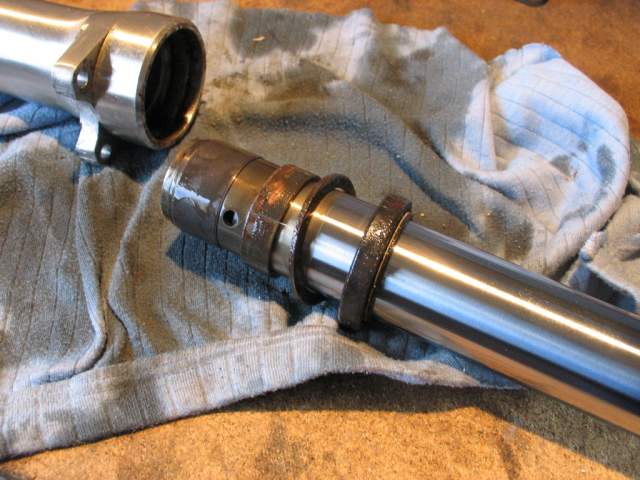
| The top seal protection washer comes out next | Followed by the rest, including the fork leg. The bottom bush can be seen in a recesss at the bottom. |

|
|
| Carefully drift the bush into place | Followed by the seal |
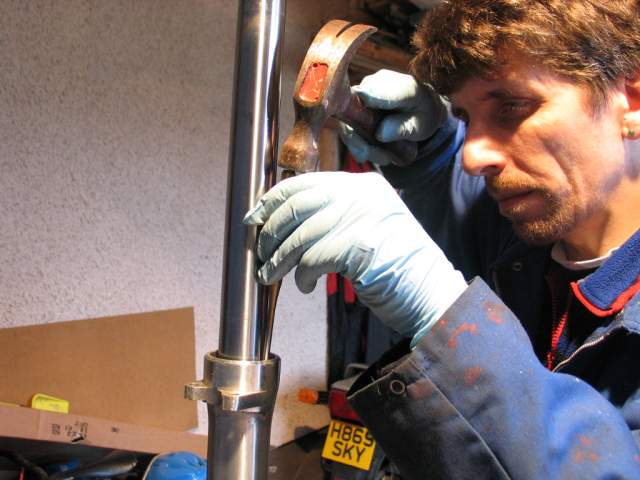
 |
| Push....Push for goodness sake. replacing the top bolts |
 |
P.S. As a nice end piece to this story, I called back the original bike shop who told me that top bushes cannot be purchased seperately. I asked to speak to "Supermechanic" and told him I had the part numer for the top bushes of an XJ900F. He said ok and took the number down and asked me how I would like to pay. I told him the bushes are purchased and fitted, I just thought you should know for future reference that they are avaiable.
He took it quite well!! ;)
And click here for the next page
James